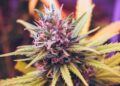
My journey into the world of indoor cannabis cultivation began rather unremarkably. I’d always been fascinated by plants, that quiet alchemy of sunlight and soil, but it was a particularly harsh winter, and my usual garden slumbered under a blanket of snow. A friend, seeing my restless energy, casually suggested, “Why not try growing indoors, Mark? You’ve got the green thumb, after all.” His words, coupled with a growing curiosity about the therapeutic potential of cannabis, planted a seed – not just in my mind, but soon, literally, in a small pot in my spare room.
That first grow, looking back, was an endearing comedy of errors. I remember painstakingly germinating a seed I’d found in a baggie of dispensary weed – a move I now chuckle at. I’d set up a makeshift grow tent with reflective blankets and a couple of CFL bulbs, convinced I was a horticultural genius. The plant, bless its heart, actually grew. It was spindly, a little stressed, and the yield was… modest, to say the least. But that initial success, however humble, ignited a passion. I realized that with a little more knowledge and a lot more patience, I could cultivate something truly remarkable. This article, then, is a distillation of my trials and triumphs, a step-by-step guide born from countless hours under grow lights, many a spilled nutrient solution, and the sheer joy of watching a plant transform from a tiny seed into a fragrant, resinous harvest.
Choosing the Right Cannabis Seeds for Indoor Growing
One of the most crucial decisions, and one I initially overlooked, is selecting the right seeds. My first attempt, as I mentioned, involved a random seed. While it worked, it was pure luck. Now, I understand the importance of genetics. For indoor growing, I generally lean towards feminized seeds to avoid the headache of identifying and removing males, which would otherwise pollinate my precious females and produce seedy buds.
When it comes to strains, I’ve found autoflowering varieties to be incredibly forgiving for beginners. They transition from vegetative growth to flowering based on their age, not light cycles, which simplifies the process immensely. My first successful autoflower was a ‘Northern Lights Auto’. It was incredibly resilient and provided a surprisingly potent harvest. However, as my skills progressed, I started experimenting with photoperiod strains like ‘Girl Scout Cookies’ and ‘Gorilla Glue’. These require a specific light cycle (usually 18 hours on/6 hours off for veg, 12 hours on/12 hours off for flower) to induce flowering, but they offer greater control over plant size and yield. I’ve also dabbled in indica-dominant strains for their relaxing effects and sativa-dominant strains for their energizing properties, always considering the limited space of my grow tent. It’s a bit like choosing a pet, really; you want one that fits your lifestyle and environment.
Setting Up the Ideal Indoor Growing Environment
My initial setup was laughably primitive, but it taught me invaluable lessons about environmental control. Now, I swear by a dedicated grow tent. They offer excellent light reflection, privacy, and most importantly, allow me to control temperature, humidity, and airflow with precision.
My current setup includes a 4×4 grow tent, a powerful LED grow light (I’ve moved on from CFLs, trust me!), an oscillating fan for air circulation, and an exhaust fan with a carbon filter. The carbon filter, I quickly learned, is non-negotiable, especially when those beautiful terpene-rich aromas start permeating the air during flowering. I remember one embarrassing incident where the scent of my blossoming plants drifted into the hallway of my apartment building. A quick trip to the hydro store for a carbon filter became an immediate priority! Temperature is key; I aim for around 70-80°F (21-27°C) during the day and a few degrees cooler at night. Humidity is also crucial. For seedlings and young vegetative plants, I keep it around 60-70%, gradually decreasing it to 40-50% during flowering to prevent mold. It’s a delicate dance, constantly monitoring and adjusting, but the plants reward you for it.
Germinating and Planting Cannabis Seeds
Germination is where the magic begins, and I’ve tried countless methods. My preferred technique, and the one that has consistently yielded the best results, is the paper towel method. I simply place seeds between two moist (not soaking wet) paper towels, put them in a Ziploc bag, and keep them in a warm, dark place. My go-to spot is usually on top of my router, as it emits a consistent, gentle warmth. Within 24-72 hours, I’ll usually see a tiny taproot emerge.
Once the taproot is about a quarter-inch long, I carefully transfer the germinated seed into a small starter pot filled with a light, airy soil mix. I make a shallow hole with my finger, gently place the seed taproot down, and lightly cover it. It’s a moment of immense anticipation, waiting for that tiny sprout to break the surface. I remember the thrill of seeing my first cotyledons – those two little rounded leaves – pushing through the soil. It felt like I was witnessing a miracle. I usually keep these starter pots under a gentle LED light, not too intense, and ensure the soil remains consistently moist.
The vegetative stage is all about growth. It’s when your plant develops its root system, branches, and leaves, preparing for the intense demands of flowering. For photoperiod strains, I keep my lights on for 18-20 hours a day during this phase.
Understanding the Vegetative Stage of Cannabis Growth
During this stage, my plants are like eager teenagers, growing rapidly. I focus on providing ample light, consistent watering, and a nutrient regimen rich in nitrogen, which is essential for healthy foliage development. I also employ various training techniques to maximize my yields and manage the plant’s shape within my limited grow space. Low-Stress Training (LST) involves gently bending and tying down branches to create a more even canopy, allowing more light to penetrate to lower bud sites. High-Stress Training (HST), like topping or FIMming, involves removing the main growth tip, which encourages the plant to grow bushier rather than taller. My first attempt at topping was nerve-wracking. I hesitated, scissors poised, convinced I was going to kill the plant. But it bounced back stronger than ever, producing multiple main colas. It taught me that cannabis plants are incredibly resilient and respond well to manipulation.
Nurturing Cannabis Plants During the Flowering Stage
This is arguably the most exciting phase for me. It’s when the plant begins to show its true potential, developing those resin-coated, aromatic buds. For photoperiod plants, I switch my light cycle to 12 hours on and 12 hours off, mimicking the shorter days of late summer.

During flowering, I shift my nutrient focus from nitrogen to phosphorus and potassium, which are crucial for bud development. I also pay close attention to humidity, reducing it to prevent mold and mildew, especially as the buds grow denser. I remember one season when I was particularly busy and neglected to manage my humidity adequately. I ended up with a small patch of botrytis, or bud rot, on one of my prize plants. It was a disheartening discovery, but it reinforced the importance of vigilance. I carefully removed the affected area, increased airflow, and learned a valuable, albeit painful, lesson. The aroma during flowering is intoxicating, a complex symphony of terpenes that promises a delightful harvest. It’s during this phase that I truly feel connected to the plants, observing their daily changes, the swelling calyxes, and the sparkling trichomes.
Cultivating cannabis indoors requires a meticulous approach to feeding, protecting, and ultimately, reaping the rewards of your labor.
Managing Nutrients and Watering for Healthy Cannabis Growth
Proper nutrient management is a delicate balance. I use a specific line of hydroponic nutrients formulated for cannabis, following their feeding schedule but always adjusting based on how my plants are responding. I’ve learned to read the leaves – yellowing lower leaves can indicate a nitrogen deficiency, while burnt tips might suggest nutrient burn. pH levels are also critical. Cannabis thrives in a slightly acidic environment, typically between 6.0 and 6.8 for soil. I religiously test the pH of my nutrient solution before every feeding.
Watering, too, is an art form. Overwatering is a common beginner mistake, and one I made more than once. I learned to lift the pots to gauge their weight, ensuring the top inch or two of soil is dry before watering again. I also ensure there’s good drainage to prevent root rot. My plants, especially during the peak of flowering, become incredibly thirsty, and it’s a joy to provide them with the nourishment they need to thrive.
Controlling Pests and Diseases in Indoor Cannabis Gardens
Pests and diseases are the bane of any grower’s existence. In an indoor environment, it’s easier to prevent them than to eradicate them. My first encounter with spider mites was terrifying. They appeared out of nowhere, tiny red dots on the undersides of leaves, leaving behind tell-tale webbing. I tried everything – neem oil, insecticidal soap, even ladybugs! It was a desperate battle, but I eventually prevailed.
Now, my approach is proactive. I inspect my plants daily for any signs of trouble. I keep my grow area clean, and if I introduce anything new to the tent, I quarantine it first. I also use beneficial insects, like predatory mites, as a preventative measure. For diseases, maintaining proper humidity and good airflow are my best defenses against mold and mildew. It’s an ongoing effort, but a healthy garden is a happy garden.
Harvesting and Trimming Cannabis Buds for Maximum Yield
The harvest is the culmination of months of effort. I look for several indicators to determine the optimal harvest time: the pistils (the hair-like strands) will have turned mostly orange or reddish-brown and receded into the calyxes, and most importantly, the trichomes (those tiny resin glands) will have transitioned from clear to cloudy, with a few amber ones appearing. I use a jeweler’s loupe or a digital microscope to observe them up close.
Trimming is a meditative process for me. I carefully remove the sugar leaves (those small leaves covered in trichomes) and fan leaves, shaping the buds and revealing their full beauty. My first harvest took me hours, hunched over with tiny scissors, but now I’ve developed a rhythm. It’s a labor of love, knowing that each trimmed bud represents the care and dedication I’ve poured into its growth.
Drying and Curing Cannabis Buds for Quality and Flavor
Drying and curing are critical for enhancing the flavor, aroma, and potency of your harvest. I dry my buds by hanging them upside down in a dark, cool, and well-ventilated space for about 7-10 days, aiming for around 60% humidity and 60°F (15-20°C). I want them to dry slowly, preserving those precious terpenes.
Once the branches snap rather than bend, it’s time for curing. I place the dried buds in airtight glass jars, filling them about three-quarters full. For the first week or two, I “burp” the jars several times a day, opening them for a few minutes to release moisture and allow fresh air in. This process continues for at least a few weeks, sometimes even months, allowing the chlorophyll to break down and the flavors to deepen. I remember opening my first properly cured jar – the aroma was incredible, a richness and complexity that my initial, hastily dried attempts lacked. It was a revelation.
Tips for Success: Troubleshooting Common Issues in Indoor Cannabis Cultivation
My journey has been paved with learning experiences, many of which involved troubleshooting. If your leaves are yellowing, it could be a nutrient deficiency or overwatering. If they’re curling or have burnt tips, it might be nutrient burn or light stress. My advice is to act quickly, but also to observe. The plant will tell you what it needs. Don’t be afraid to consult online forums, books, and experienced growers. The cannabis community is incredibly supportive. And most importantly, enjoy the process. Growing cannabis indoors is more than just cultivating a plant; it’s a continuous lesson in patience, observation, and the profound power of nature. It’s a hobby that has brought me immense satisfaction and a deep appreciation for the living world.