The scent of damp earth and growing things has always been a calming presence in my life, a stark contrast to the sterile spreadsheets and city noise I often navigate. For years, I’d admired cannabis from afar, fascinated by its resilience and the artistry involved in coaxing it to life. It wasn’t until a particularly stressful period at work that I decided to take the plunge, transforming a spare closet into my own little green sanctuary. It was a learning curve, let me tell you, filled with more than a few wilting leaves and the occasional frantic Google search at 2 AM. But through trial and error, and a whole lot of patience, I’ve begun to truly understand what it takes to cultivate healthy, potent cannabis indoors. This journey has taught me that it’s not just about throwing seeds in dirt; it’s a delicate dance of science and intuition, an art form in its own right.
The first, and perhaps most crucial, step in any indoor grow is selecting the right strain. It’s like choosing a pet; some are high-maintenance divas, others are robust and forgiving. My early attempts were with some landrace strains I’d read about, eager for their purported purity, but they were slow growers and prone to deficiencies that I, as a novice, had no idea how to combat. I remember one particular plant, a Sativa-dominant beauty, that stretched so tall it brushed against the ceiling light, causing a terrible light burn I desperately tried to salvage. It was a valuable lesson in understanding plant structure and growth habits. For beginners, autoflowering strains are often the gold standard, and for good reason. They’re bred to transition from vegetative growth to flowering automatically, taking the guesswork out of light cycles. They also tend to be more compact, making them ideal for smaller spaces. I’ve found that strains with a good reputation for resilience and a shorter flowering period, like Northern Lights or many of the popular Kush varieties, are excellent starting points. They offer a forgiving nature while still delivering satisfying results.
Finding Your Autoflower Ally
When I first started, the sheer variety of strains was overwhelming. It felt like standing in a candy store with a blindfold on. I learned to rely on reputable seed banks and online forums where growers share their experiences. Look for strains that are specifically bred for indoor growing, with descriptions mentioning bud density, pest resistance, and ease of cultivation. My current favorite auto is a Blueberry strain that consistently produces dense, frosty buds with a wonderfully sweet aroma, and it’s practically bulletproof against minor environmental fluctuations.
Building Your Bud Base Camp
Setting up the right environment is paramount. Think of it as creating the perfect nursery for your delicate plants. A small grow tent is a fantastic investment for beginners. It’s a self-contained ecosystem that helps you control light, temperature, and humidity. I started with a humble closet, which worked, but the light leakage and temperature control were constant battles. A tent is a game-changer. Ventilation is also critical. You need fresh air exchange to prevent mold and mildew and to provide your plants with the CO2 they need for photosynthesis. Exhaust fans and intake fans, along with carbon filters to keep those tell-tale odors at bay, are essential components. I learned the hard way that stagnant air is a breeding ground for problems; my first grow had a minor spider mite infestation that I believe was exacerbated by poor air circulation.
The Importance of a Controlled Climate
Beyond the tent itself, consider the substrate you’ll be using. Soilless mediums like coco coir or perlite blends offer excellent drainage and aeration, preventing root rot, a common killer of beginner plants. I used regular potting soil initially, and while it worked, the watering was trickier, and I found myself dealing with more compaction. Soilless mixes allow for more precise control over nutrient delivery and air to the roots.
Light is the engine of your cannabis plant’s growth. Without sufficient, high-quality light, you’re essentially trying to run a marathon on an empty stomach. For indoor growing, LEDs are the undisputed champions these days. They’re energy-efficient, produce less heat than older HID lights, and offer a spectrum of light tailored to different growth stages. My initial foray involved a cheap blurple LED that looked like a rave in my closet. The plants grew, but the bud development was weak, and the energy bill was a shock. Investing in a good quality full-spectrum LED light made a world of difference. You’ll see healthier foliage, more vigorous growth, and ultimately, denser, more potent buds.
Understanding the Light Spectrum
Different light spectrums play different roles. Blue light is crucial for vegetative growth, promoting bushy, compact plants. Red light is essential for flowering, encouraging bud development and stretching. Full-spectrum LEDs provide a balance of both, mimicking natural sunlight, which is ideal for the entire plant lifecycle. Pay attention to the wattage and the PPFD (Photosynthetic Photon Flux Density) rating of your lights. Higher PPFD means more usable light for your plants, translating to better yields.
The Delicate Balance of Nutrients and Water
Nutrients are the food for your plants, and watering is their drink. It sounds simple, but this is where many growers stumble. Overwatering is a common mistake, leading to root rot and stunted growth. Underwatering, of course, is just as detrimental. The key is to find that sweet spot. I’ve learned to water only when the top inch or two of the medium feels dry to the touch. A simple moisture meter can be an invaluable tool here, saving you from the guesswork.
Tailoring Your Feeding Schedule
Cannabis plants have specific nutritional needs that change as they grow. During the vegetative stage, they require more nitrogen for leaf and stem development. As they move into flowering, their needs shift towards phosphorus and potassium for bud production. There are many excellent nutrient lines available specifically for cannabis, and most come with feeding charts. I always start with half the recommended dosage and gradually increase it, observing my plants for any signs of deficiency or nutrient burn. Nutrient burn, which manifests as yellowing or crispy leaf tips, is a clear indicator that you’re giving them too much. It’s always better to underfeed slightly than to overfeed.
Controlling your environment goes beyond just light and nutrients. Temperature and humidity play a crucial role in plant health and development. I’ve experienced firsthand how a sudden heatwave can stress plants, leading to hermies (hermaphroditic plants) or reduced cannabinoid production. Similarly, high humidity can encourage mold and mildew, especially during the flowering stage when buds become dense.
The Sweet Spot for Temperature and Humidity
Aim for a temperature range of 70-80°F (21-27°C) during the day and slightly cooler at night. Humidity levels should ideally be around 40-50% during flowering, but can be a bit higher during vegetative growth. A small hygrometer can help you monitor these levels, and you can adjust with fans, dehumidifiers, or humidifiers as needed. I once had a grow where I didn’t adequately control humidity in the final weeks, and I discovered some powdery mildew on a few lower buds – a costly lesson in vigilance.
Shaping Your Green Sculptures: Pruning and Training
Pruning and training are the artistic touches that allow you to maximize your yield and improve bud quality. Think of it as sculpting your plant to direct its energy where you want it most – into those glorious buds. Techniques like topping and LST (Low-Stress Training) encourage lateral growth, creating a bushier plant with more bud sites. My first few grows were simply letting the plants grow naturally, and while I got buds, they were often top-heavy and uneven. Implementing LST, gently bending and tying down branches, created a more uniform canopy, allowing light to penetrate all areas of the plant.
Super Cropping and Defoliation
For more advanced growers, techniques like super cropping, where you gently bend and crimp a stem to stimulate growth, can further enhance yields. Defoliation, the careful removal of larger fan leaves, can also improve light penetration and airflow to lower bud sites. However, it’s crucial to do this judiciously, as those leaves are also vital for photosynthesis. Always err on the side of caution, and research the best practices for your specific strain.
No matter how meticulously you set up your grow, pests and diseases can still find their way in. Early detection and intervention are key to preventing a minor issue from becoming a catastrophic infestation. I’ve had my fair share of encounters, from the dreaded spider mites to the insidious fungus gnats.
Recognizing and Reacting to Invaders
Educate yourself on common cannabis pests and diseases. Learn to identify the tell-tale signs: the tiny webs of spider mites, the small black flies of fungus gnats, or the white powdery spots of mildew. My first experience with spider mites was a nightmare. I was so focused on watering and nutrients that I overlooked the tiny speckles on the underside of the leaves. By the time I noticed, they were everywhere. Now, I regularly inspect my plants, even the undersides of leaves, for any abnormalities.
Natural Defenses and Prevention
Many excellent organic pest control solutions are available, such as neem oil or insecticidal soap. Regular cleaning of your grow space is also essential to prevent pests from establishing a foothold. A healthy plant is also more resistant to pests and diseases, so don’t neglect your basic care. For prevention, I always use sticky traps to monitor for flying insects and treat any early signs aggressively.
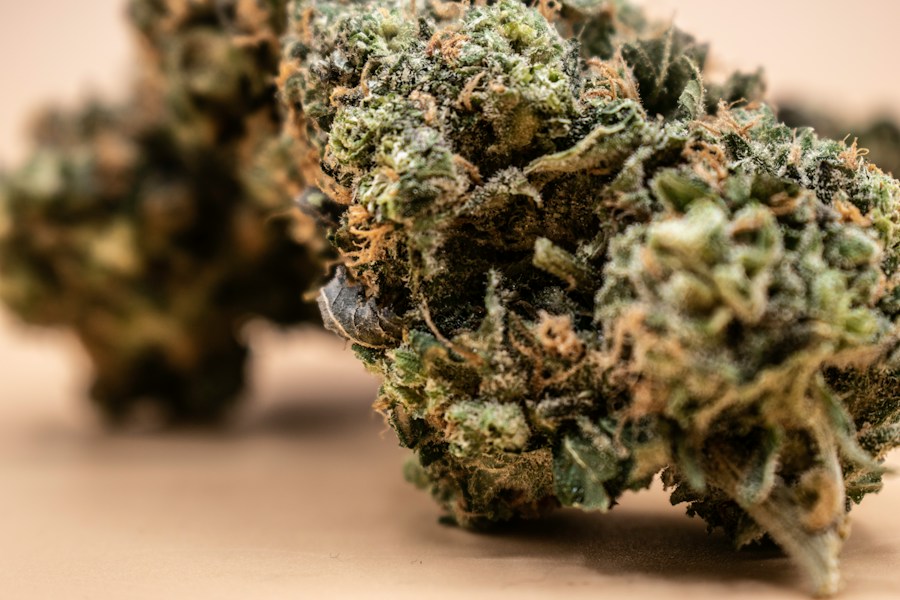
The moment of harvest is a rewarding culmination of your efforts. Knowing when to harvest is as important as any other aspect of the grow. The trichomes, the tiny mushroom-shaped crystals on your buds, are your best indicators.

Judging the Perfect Harvest Time
When the trichomes are mostly milky white with a few amber ones appearing, it’s generally time to harvest for a balanced effect. If you wait until most are amber, the effect will be more sedating. I’ve harvested a bit too early a few times, resulting in buds that felt a little “green” and less potent. Conversely, waiting too long can lead to a significant drop-off in potency. A jeweler’s loupe or a digital microscope is invaluable for examining trichomes.
The Art of Curing for Maximum Flavor and Potency
Once harvested, the drying and curing process is where the magic truly happens. Drying should be slow and steady, in a dark, cool environment with good airflow, to preserve terpenes and cannabinoids. My first few harvests were dried too quickly, leading to a harsh smoke. Curing, typically done in airtight jars, allows the chlorophyll to break down and the remaining moisture to evenly distribute, resulting in a smooth, flavorful, and potent end product. This process can take several weeks, but the patience is rewarded tenfold.
Once you’ve mastered the basics, you might find yourself wanting to push your yields and cannabinoid production to the next level. This is where advanced techniques come into play.
Maximizing Yields with Advanced Training
Techniques like SCROG (Screen of Green), where a screen is used to train branches horizontally, create an incredibly dense and uniform canopy, maximizing light exposure and bud sites. I’ve seen incredible results with SCROG, transforming a single plant into a massive producer. Another technique is Sea of Green (SOG), which involves growing many small plants very close together, allowing for an earlier harvest of multiple small colas.
Understanding Light Cycles and Photoperiods
While autoflowers are convenient, for those seeking the highest possible yields and the ability to control the plant’s lifecycle completely, understanding photoperiod strains is essential. These strains require specific light cycles – typically 18-24 hours of light during vegetation and a strict 12 hours of light and 12 hours of darkness to trigger flowering. Mastering these light cycles allows for greater control over plant size and flowering time.
Even experienced growers encounter problems. The key is to approach them with a calm, analytical mindset.
Diagnosing Nutrient Issues and pH Imbalances
Nutrient deficiencies and pH imbalances are two of the most common culprits behind unhappy plants. Yellowing leaves, stunted growth, or unusual leaf coloration can all point to a problem. Always check your pH levels of your water and nutrient solution. A pH meter is an inexpensive but vital tool. Most cannabis strains prefer a slightly acidic pH range, typically between 5.8 and 6.5 in soilless mediums. If your pH is too high or too low, your plants won’t be able to absorb the nutrients they need, even if they are present.
Pest and Disease Management Strategies
As mentioned earlier, early detection is key. If you spot pests or signs of disease, act quickly. Sometimes, a simple wipe-down with a damp cloth can remove early infestations. For more stubborn problems, research specific organic treatments tailored to the issue. Remember, prevention is always better than cure. Maintaining a clean grow environment, practicing good hygiene, and ensuring your plants are healthy and robust will go a long way in preventing many common problems. My journey into indoor cannabis cultivation has been a rewarding one, a constant learning process filled with moments of triumph and the occasional setback. It’s a hobby that fosters patience, observation, and a deep appreciation for the natural world, all from the comfort of your own home.